
In addition to the celebrating the spiritual side of Easter Sunday, our family always has so much fun celebrating the joy of Easter with beloved traditions.
Even though our girls are grown, they still love getting Easter baskets filled with dyed eggs, candy, chocolate Easter bunnies (with the ears bitten off of course! Haha!) and little gifts. We leave a plate of carrots out for the Easter Bunny and he always leaves the girls a note for them to read the next morning.
I found this darling Bunny Box (Design #57771) from Snapdragon Snippets in the Silhouette Online Store and thought it would be so much fun to make for friends, co-workers or neighbors. You could make one for each person that’s joining you for Easter dinner and put it at their place setting, that would be really, really cute. At the end of this post you will find tips to make the Bunny Box and the Carrot Box.
In our family, the real fun begins when everyone gathers at Granny and Papa Coonie’s for the Easter Egg hunt. Mind you, the youngest grandchild is now 17, but as long as you are “young at heart” you can join in the Easter Egg hunt. We usually hide anywhere from 12-15 dozen eggs (there are a LOT of grandkids!!!) and it’s a fierce competition to see who will win! There’s always so much of laughter!!!
I hope your family has a very Blessed Easter filled with joy, laughter and lots and lots of love!
Peace, Love and Joy,
Joyce
Sharing my creativity to inspire yours at www.facebook.com/peaceloveandjoyce, www.instagram.com/peaceloveandjoyce, www.twitter.com/PeaceLove_Joyce
 |
|
http://www.silhouetteonlinestore.com/?page=view-shape&id=57771 |
 |
|
http://www.silhouetteonlinestore.com/?page=view-shape&id=57770 |
TIPS & HINTS

When you open the Bunny Box file in your Silhouette software this is what it will look like. You will need to ungroup the design and move the pieces you don’t need off the grid. (More info on how to do that in the Carrot Box directions below.) For my Bunny Box I used Stampin’ Up! Whisper White, Blushing Bride, Real Red and Basic Black card stock.
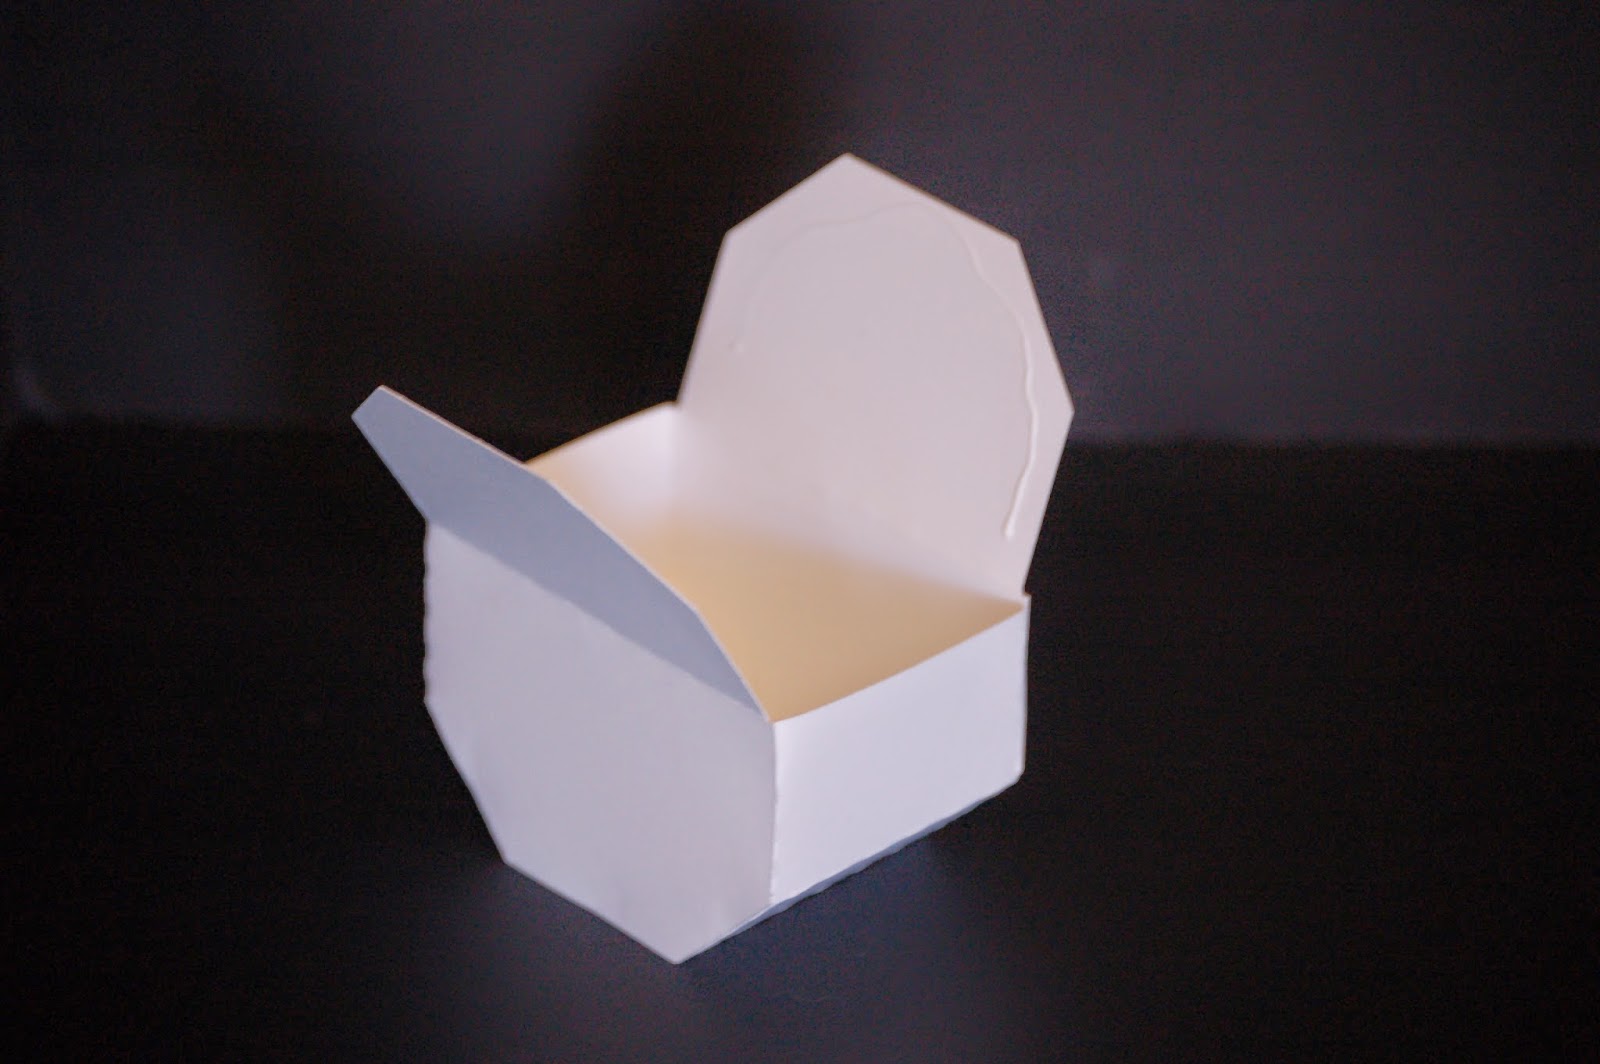
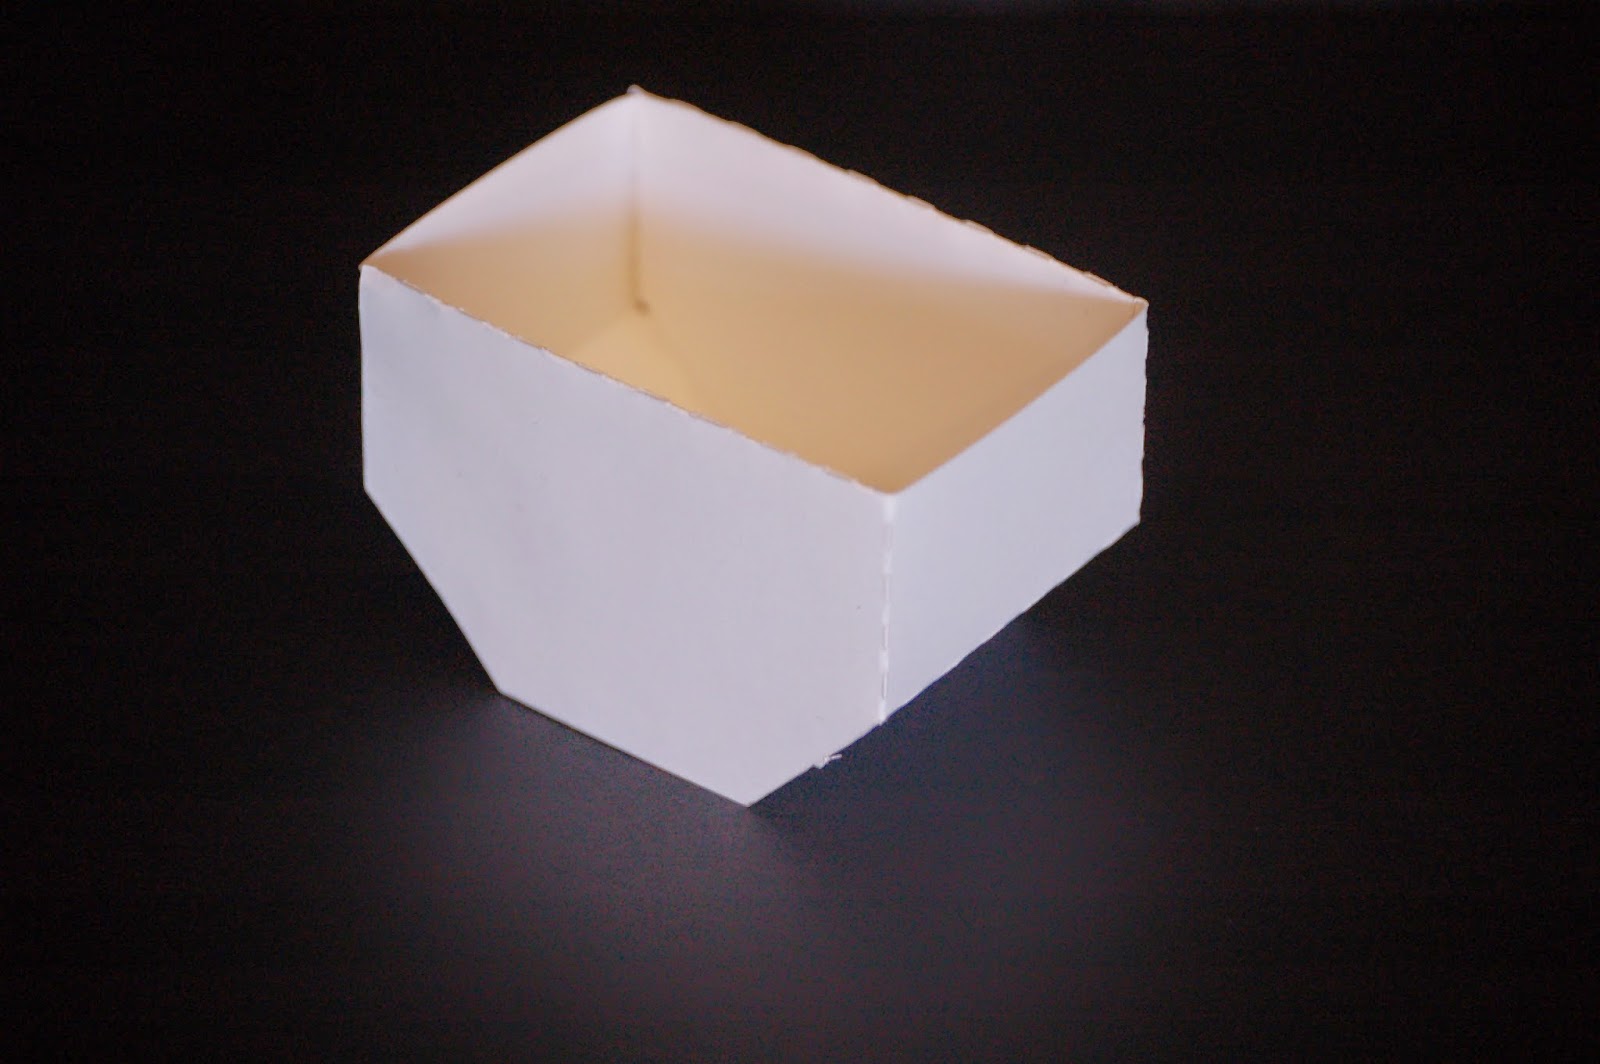
It took me a couple minutes to figure out how to make the box part of the bunny because I was unsure of how the flaps worked. Once I shaped the scored rectangle sections around the bottom edge of one flap, I realized that the other flap folded down to cover the edges and give you a much neater appearance! It makes the box look so much more professionally done! Thanks designers at Snapdragon Snippet for thinking of that!!! I used Tombow Mono Multi liquid glue to assemble the box.

Before assembling the bunny, I sponged Stampin’ Up! Crumb Cake Classic Ink all around the edges of both the Whisper White and Blushing Bride (pink) pieces. I attached the Whisper White pieces to the Blushing Bride background piece with Stampin’ Dimensional foam dots. Using the foam dots to make the piece more dimensional really adds to the cuteness factor. The Basic Black nose and eyelashes were attached with Snail adhesive.
4 SIDED CARROT / Design ID #57770

When you open the 4-Sided Carrot file in your Silhouette software this is what it will look like. First thing you will need to do is “Ungroup” the design and drag the 2 large orange base sections off to the gray area on the side of the grid.
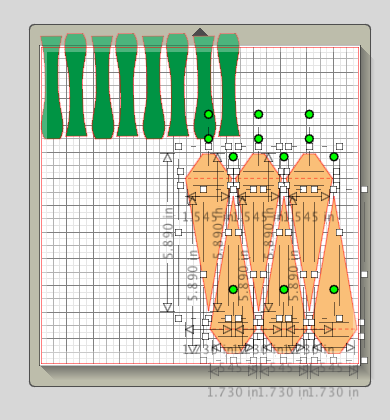
Then using the “Select” tool, draw a box around the lighter orange side panel pieces so they are all highlighted as shown above, click “Group”, then drag them off the grid. Finally, using the “Select” tool, draw a box around the 8 leaves, click “Group”, then move the section of leaves down so that none of the design is off the grid. Proceed to cut out the leaves, then move them off the grid and bring the next section you are cutting on to the grid.
For my carrot I used Stampin’ Up! Pumpkin Pie card stock for the base of the carrot, then I used the Pumpkin Pie polka-dots and the Old Olive stripes from the Color Collection Designer Series Paper Stacks. I used Snail adhesive to adhere the side panels and the leaves to the base, then used Tombow liquid glue to assemble the carrot box. Use your fingers to gently shape the leaves so they curl outwards. Fill the carrot box with candy or a small gift, then finish the box by tying a 12″ piece of ribbon around the leaves.
Your family and friends are going to love receiving these Easter boxes!
Hope you have a joyous Easter Sunday!
Peace, Love and Joy,
Joyce
![]()
What a great Easter set! You are right, it goes with the card I made perfectly 🙂
Hi Beth,
Thanks for visiting Peace, Love and Joyce! I’m so glad you liked my projects. I’m wondering if you would allow me to add your card to this post? I would be happy to link to your blog. Thanks!
Peace, Love and Joy,
Joyce